")
")
Note: The installation of a Quickstart package works basically the same as a normal Joomla! installation!
1. Prepare for Install
1. Create a directory on the web space in which you want to install Joomla! The root directory is usually called "public_html" or "htdocs". It is recommended to install Joomla in a subdirectory.
2. Set this (sub) directory as the target directory for your domain! You can also use a subdomain.
3. Now you still need a MySQL database. It is recommended to create a new database for this!
4. Make a note of basic information about the database (you will need this during configuration):
- Location of database: mostly "localhost", more rarely an external database server such as "dbserver.example.com"
- The database name
- The database user's name
- The database user's password
2. Upload of the Installation Files
5. Now the Joomla files (files & directories) must be moved to the directory (Joomla root directory) on the web server. There are 2 options for this:
1st option:
- First unzip the Quickstart package locally on your computer! The Joomla files are extracted into a folder.
- Then move all Joomla files that are inside the folder to the web server!
Use an FTP client such as FileZilla (current version!) for this!
2nd option: (more quickly)
- First move the Quickstart package to the web server!
Use an FTP client such as FileZilla (current version!) for this! - Then extract the Quickstart package directly on the web server! There are several methods for this, e.g. using your own script or with the help of kickstart.php. Corresponding instructions can be found here:
UNPACKING ZIP
3. Installation - Start
6. Now that all Joomla! files are on the web space, you can use the Joomla! - web installer. Call up your domain in a browser, e.g. www.example.com!
7. Now a pre-installation check takes place. If individual requirements are not met (marked as "No"), this may result in the Joomla website not functioning properly. The problems should be fixed before installation!
8. Furthermore, some recommended and the current PHP settings are displayed. These are important for full compatibility with Joomla. Nevertheless, the Joomla website should still work if one or the other setting does not correspond to the recommended setting.
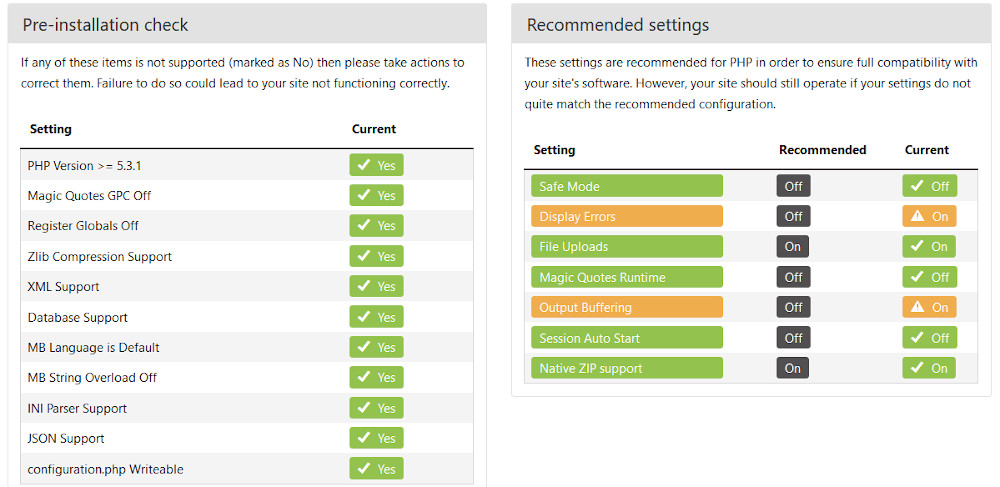
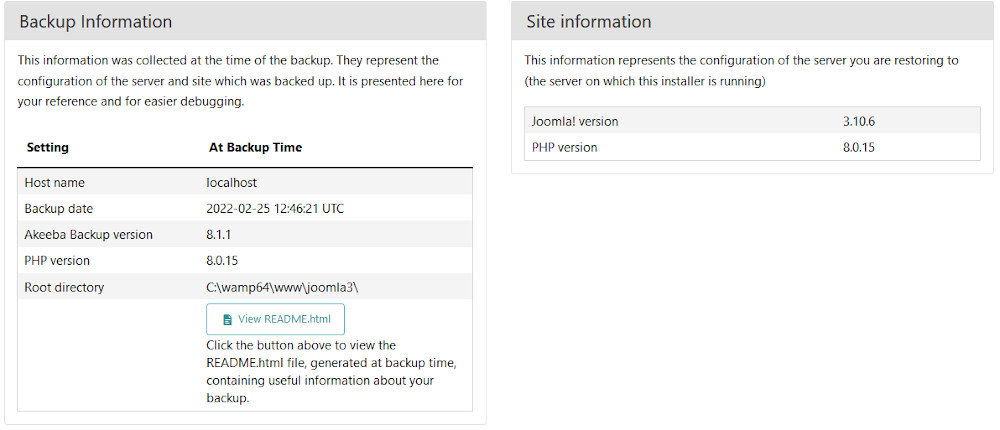
9. Information on the server configuration during the creation of the quickstart package and on the current server configuration is also displayed in the lower area.
10. Finally, click on the button "Next" to start the installation!

4. Installation - Configuration of the database
11. Fill in all the information about the database that you want to use for Joomla!
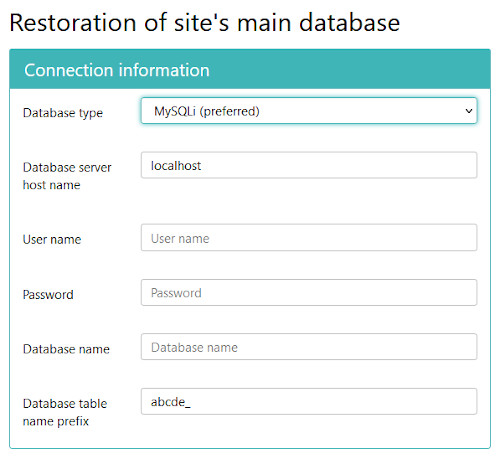
- Database Type: MySQLi is the common database used.
- Host Name: Enter the server for your database! Usually this is
localhost. However some servers also use an external database server, e.g.dbserver.example.com - User Name: Enter the username for the connection to the database here! Note: This does not mean the username for the administrator!
- Password: Enter the password for the database's username!
- Database Name: Enter the name of the database!
- Table Prefix: Choose the prefix for the DB tables! One is generated automatically, but you can change (e.g.
jos3_) . Note the required underscore at the end of the prefix!
12. Now click on the button "Next" to generate the database tables!

13. Successful completion of database recovery is indicated as follows:

14. Finally, click on the button "Next step"!
5. Installation - Set up site
15. Fill in the following information. Tip: All information can be changed later in the global configuration:
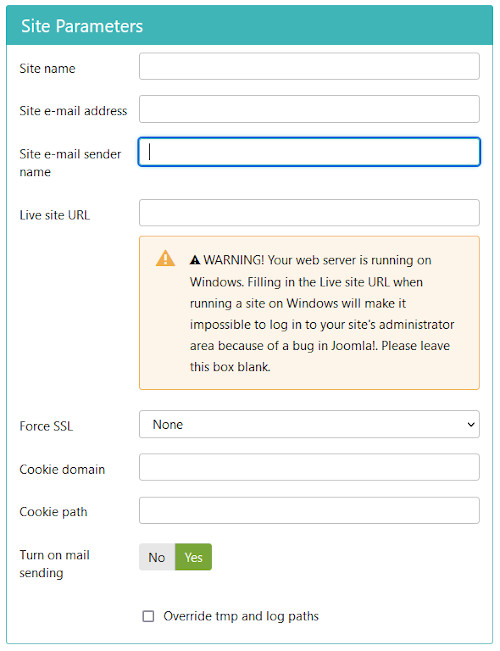
- Name of webseite: Enter the name of your website!
- E-mail address of webseite: Enter the email address that should be used for the website!
- E-mail sender name: Enter the sender's name for the email address!
- Live site URL: Be sure to leave this field blank! An entry usually leads to problems.
- Force SSL: If your domain can already be accessed via https, you can already select "Force SSL" here! Alternatively, this can also be done via a corresponding entry in .htaccess. Important: If no SSL certificate is active for the domain, then initially set "Force SSL" to "None". Otherwise you cannot access the website.
- Cookie domain: Be sure to leave this field blank! An entry usually leads to problems.
- Cookie path: Leave this field empty as well! An entry usually leads to problems.
- Email sending: To enable Joomla to send emails, select "Yes", otherwise select "No"!
- Override tmp and logs paths: If you enable "Override" Joomla will try to set the correct paths! These are shown below.
16. Check the absolute paths for the tmp and logs directories!
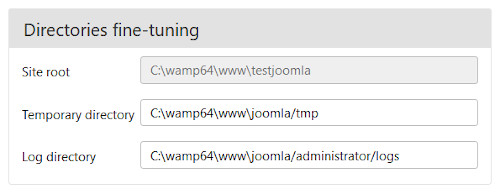
- tmp directory: Check the path for the "tmp" directory and correct it if necessary! The "tmp" directory is located in the Joomla root directory.
- logs directory: Check the path for the "logs" directory and correct it if necessary! The "logs" directory is located in the Joomla administrator directory.
17. In the next place you can (if desired) reset the configuration files for the server. However, the quickstart packages normally do not contain such configuration files, so that no changes need to be made here:
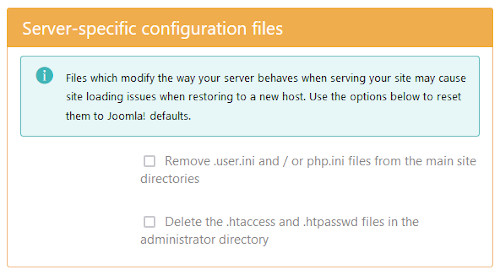
- .user.ini/php.ini: If necessary, .user or php.ini files can be removed from the Joomla main directory.
- .htaccess/.htpasswd: If necessary, .htaccess and .htpasswd files can be removed from the administrator directory.
Note: You can create your own configuration files for the server at any time after the installation is complete!
18. Now enter the login data!
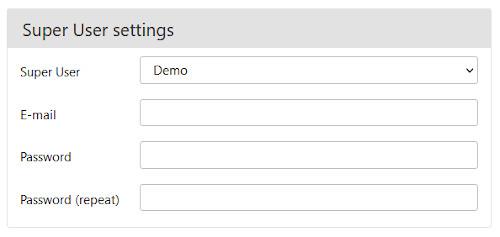
- Super User: There is already 1 Super User named "Demo". Choose this one!
- E-mail: Enter a valid email address for the Super User!
- Password: Enter a strong password for the Super User! This must be at least 12 characters long.
- Password (repeat): Please enter the selected password again! Both passwords must match.
19. Click the button "Next", to continue to the next page!

6. Installation - End
20. Now click on the Button "Remove the installation directory"! This will remove the "installation" directory. This is necessary so that the website can also be accessed. Otherwise the installation routine would start again.

21. Finally, the removal of the installation directory is confirmed!
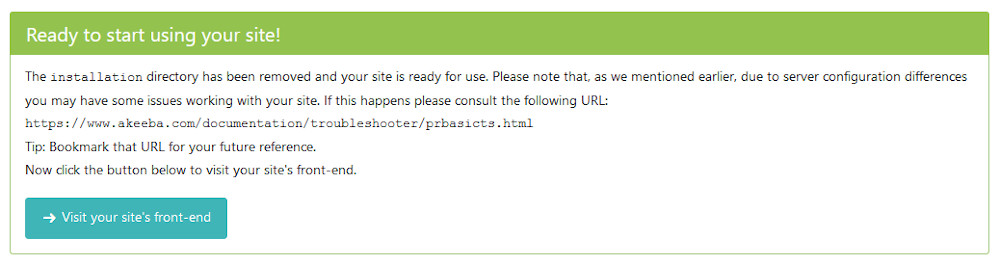
Your Quickstart installation is now complete!
Go to your website
(Replace example.com with your domain or subdomain!)
- Frontend: www.example.com
- Backend: www.example.com/administrator